Node.js developers may install many NodeJs versions on a single system with the aid of NVM, or Node Version Manager.
Table of Contents
When working on several projects that require multiple versions, this tool becomes quite helpful.
The ability to transition between several Node.js versions is another feature of NVM.
Moreover, NVM uses extremely basic instructions to make the installation and uninstallation of different Node.js versions easier.
Anyway, in the following parts, you will explore how to use the commands of Node Version Manager and install it on various operating systems. Let’s get started.
Installing Node Version Manager (NVM) on Windows
To install NVM on Windows, go to this link and download the program that meets your machine’s requirements.
Then, follow the steps below one by one.
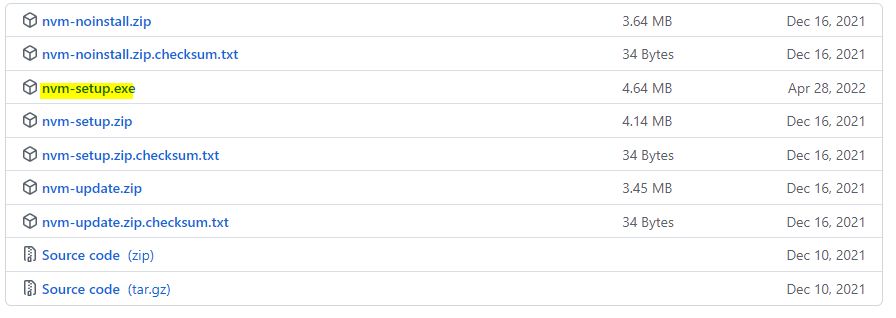
After downloading the program, just double-click it.

In the above screen, you may see the license agreement screen in the image above. Simply choose – “I accept the agreement“ to accept the conditions of the license.
In the following stage, just press the – “next“ button.

On this screen, you have to choose the installation path or leave it as the default location.
Once the – “next“ button appears, just click on it.
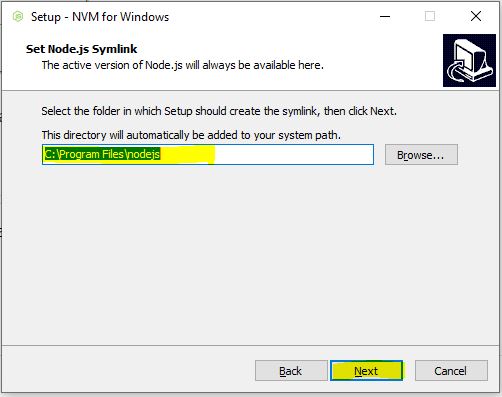
The figure below indicates that in order to add a – “symlink“, you just need to choose the path for the Node.js folder.
If the default location path is correct for Node.js, you can leave it. Otherwise, choose the new location path.
In the next step, you will see the final installation screen. Just click on the – “install“ button.
Once the confirmation window appears in the following installation screen, just click on the – “Yes“ button.
Anyway, if your operating system is Ubuntu, just scroll down into the below section to learn how to install NVM on Ubuntu. Let’s dive right in.
Installing NVM on Ubuntu
In this part, we will focus on the Ubuntu operating system, which means it requires additional tools to help us download the NVM package.
The first package we can use is – “curl.” If you don’t have – “curl“, just open your terminal and write the below command to install it on your operating system.
But before you do that, just update the Ubuntu package by using the below command.
sudo apt-get updateThen run the below one to setup the – “curl” package.
sudo apt install curlWell done! In the following step, we simply need to download the NVM package into our operating system, and that can be done using the following command:
sudo curl -o- https://raw.githubusercontent.com/nvm-sh/nvm/v0.39.1/install.sh | bashAlso, if you are not familiar with the – “curl“ package or don’t have the installation, an alternative is to use the – “wget“ package. Let’s download it.
sudo wget -qO- https://raw.githubusercontent.com/nvm-sh/nvm/v0.39.1/install.sh | bashIf you run one of the previous commands, it will download the NVM package onto your machine. But there are another two steps: setting up the NVM directory and loading its functionality into your current shell session.
That can be achieved with the below commands.
export NVM_DIR="$([ -z "${XDG_CONFIG_HOME-}" ] && printf %s "${HOME}/.nvm" || printf %s "${XDG_CONFIG_HOME}/nvm")"
[ -s "$NVM_DIR/nvm.sh" ] && \. "$NVM_DIR/nvm.sh" # This loads nvmsource ~/.profileThat’s all. Let’s move on to the following section to learn how to verify NVM. This is a validating command to check if it was correctly installed on your machine or not.
Verifying the Node Version Manager (NVM) Installation
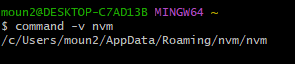
Checking if NVM is installed on your machine is very simple.
command -v nvmBy executing this command, it will print the path of the NVM system on your machine.
Anyway, let’s move on to the following sections to learn how to manage our Node.js versions using NVM.
Installing a Specific Node.js Version with NVM
Before starting the installation, you have to know what version you need to install on your machine.
Here is a table that contains all released versions of Node.js.
Once you have selected a specific version, you can install it using the below command:
nvm install 15.0.0To set up another Node.js version, you can use the same command. But remember to change the version number of the upcoming node package.
In the following part, you will learn how to show all Node.js versions that are installed on your machine using the command line.
Listing All Node.js Versions with NVM
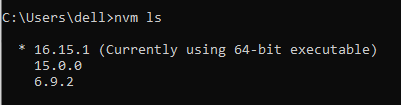
To display all of the Node.js versions that are installed on your machine, just execute the following command:
nvm lsThe output will show you all Node.js versions. The current active version will be highlighted with an asterisk.
To learn how to switch from one version to another using the NVM command, follow the below section.
Switching Between Node.js Versions Using NVM
If you decide to switch the current node version to another, you can activate it using the command below.
nvm use 15.0.0Remember to change the version number when using the command.
That’s all. Let’s move onto the below section to explore the common issues and their solutions that may happen when using NVM.
The Common NVM Issues
If you encounter any issue during the switch process, such as – “access denied“ message, simply rerun the command line in administration mode by selecting – “Run as Administrator“.
Another common issue is like the one below, which is – “The current directory is no empty“.

To solve this issue, you have to open the path of the Node.js folder, which is commonly located on this path, – “C:\Program Files\nodejs “ and then change the – “nodejs“ folder name to – “nodejsx“. To be like this, – “C:\Program Files\nodejsx” then rerun the command again.
Anyway, let’s explore how to access help within the NVM command.
Getting Help with NVM
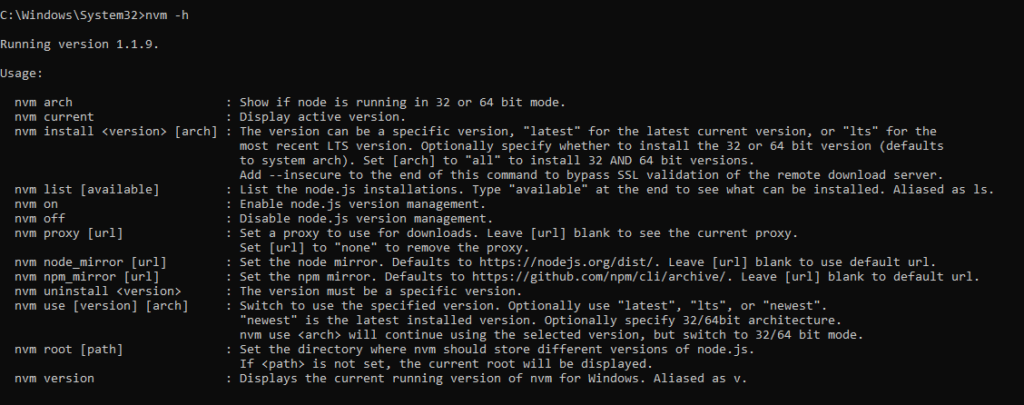
If you find yourself unfamiliar with NVM commands or need help, simply run the following command:
nvm -h OR
nvm --helpIt will show all options associated with the NVM command, as displayed in the following screen.
Anyway, let’s summarize this information in a few lines.
Wrapping Up
NVM stands for Node Version Manager, which enables us to manage versions on one computer.
To install NVM on the Windows operating system, download the software from this link.
If your operating system is Ubuntu, you need to use – “curl” or – “wget”, to fetch the package on your machine. And then run the below commands to complete the setup.
export NVM_DIR="$([ -z "${XDG_CONFIG_HOME-}" ] && printf %s "${HOME}/.nvm" || printf %s "${XDG_CONFIG_HOME}/nvm")"
[ -s "$NVM_DIR/nvm.sh" ] && \. "$NVM_DIR/nvm.sh"; # This loads nvm
source ~/.profile;Once you have installed the NVM, you can verify it using this command: command -v nvm.
To install the Node.js version using NVM, you need to run this command: nvm install <version>.
And you can display all versions that are installed on your machine using this command: nvm ls
To switch to another version, use this command: nvm use <version>
And finally, you can get some help from NVM by running this command: nvm –h
Thank you for reading. Happy Coding!