In this article, you will learn how to insert more than a million records into the SQL Server database table. Additionally, you will understand how to use the SQL bulk insert command and import a large file of data using C# and procedure – just pay attention during the reading.
Basically, SQL Server bulk insert is a command that can be executed on the SQL server, and it gives you the ability to send a full file to the database table.
Here are the basic prerequisites to understand this tutorial:
- Some knowledge of SQL query commands.
- Some knowledge of C# or any other .NET programming language.
- An SQL Server database.
- SQL Server Management Studio.
Before we delve into how to use the SQL Server bulk insert, it is essential to understand the differences between the following:
- SQL
- SQL Server
- MySQL
Let’s get started.
The Differences between SQL, SQL Server, and MySQL
SQL
SQL refers to Structured Query Language, which can be used to interact with databases.
The common uses of the SQL query include retrieving data from the database, deleting rows, and inserting and updating records using SQL.
Therefore, we can say that SQL is a query language used for dealing with and interacting with databases. Additionally, there are several database management systems utilizing SQL queries in their products, including Microsoft SQL Server, Oracle, Ingres, and among others.
Anyway, in the following section, you will see some examples of the SQL Query.
The first one is the retrieve command.
SELECT name, price, quantity FROM products;Another common command is the insert command.
INSERT INTO products (name, price, quantity) VALUES ('T-Shirt', '$55.00', 5);To delete records from a database, you can use the following command:
DELETE from products WHERE name='T-Shirt';Additionally, there is another query that can be used to update data in the database using the SQL language.
UPDATE products SET quantity='', price='' WHERE name='T-Shirt';As observed from the previously mentioned commands, which show you that SQL is solely a query language.
Anyway, in the upcoming lines, we will explain what MySQL and SQL Server are.
MySQL and SQL Server
Basically, MySQL and SQL Server are database management systems that use the SQL language within their platforms.
MySQL and SQL Server assist developers in viewing the database table through a graphical user interface (GUI).
And they also enable developers to execute SQL commands within their platforms.
Thus, the crux of the matter is that without the SQL language, SQL Server and MySQL would not function, owing to their dependency on it.
On the other hand, let’s delve into one of the SQL statements in SQL Server Management Studio, which is the Command of SQL Server Bulk Insert.
SQL Server Bulk Insert Syntax
Actually, the SQL bulk insert is used to store the data from external files in the database table. Additionally, it is also used to view and import data from Azure blob storage or any other disk; you just need to specify a valid path for the importable file.
Its command consists of numerous arguments and options, as shown below.
BULK INSERT <strong>[table_name]</strong> FROM <strong>[file_path]</strong> WITH <strong>[options]</strong>As observed in the previous command, many arguments are added, such as table_name, file_path, and options. let’s take a look at each one.
- table_name refers to the name of the database table. It can be specified either directly with the table name or with the full name starting from the database name and ending with the table name, like this: atabase_name.schema_name.table_name.
- file_path refers to the path of the data file, and it should be a valid path, free from any permission restrictions.
- options refer to all the options that are applied while executing the command.
Let’s move into the options of SQL Bulk Insert.
SQL Server Bulk Insert Important Options
In this section, we will highlight some of the important options associated with the SQL Server bulk insert command. When setting the file path, it is necessary to define the extension name of the file.
Format Option
The file extension can be specified using the “FORMAT” option to define a Comma-Separated Values (CSV) file. It can be done as shown below.
BULK INSERT book FROM 'D:\\book_data.csv' WITH (
FORMAT = 'CSV'
);File Format
It specifies the file format. The list below shows some of the file formats that are compatible with SQL bulk insert.
- Comma-Separated Values ( CSV )
- XML
Collecting Errors
Naturally, when attempting to insert data into a database, it is crucial to verify whether this data has already been inserted or not. Additionally, there are instances where errors may occur behind the scenes. How can one identify and reveal these errors?
Microsoft has already implemented an option inside SQL bulk insert to collect all rows that encounter errors or have datatype formatting issues in the same directory for the CSV file. This property is called “ERRORFILE”.
With the same previous SQL code, we have the capability to specify the error file path within the SQL command, as demonstrated in the following code:
BULK INSERT book FROM 'D:\\book_data.csv' WITH (
FORMAT = 'CSV',
<span style="background-color: inherit; font-family: inherit; font-size: inherit; color: initial;">ERRORFILE</span> = 'D:\\database_errors.txt'
);Separate the CSV file into smaller batches based on a specified size
If you do not specify the batch size, the SQL transaction’s operating system will store the entire CSV file in one batch. However, by specifying the “BATCHSIZE” property, you can partition the processing into a series of smaller batches.
BULK INSERT books FROM 'D:\\small_file.csv' WITH (
FORMAT = 'CSV',
BATCHSIZE = 3
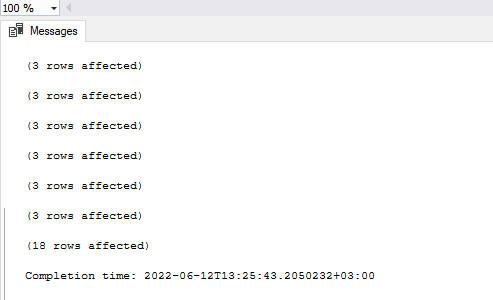
);The process inserts file records every 3 rows. This means it inserts 3 rows, then starts to insert another 3 rows, and so on until it finishes all the rows inside the CSV file.
With the previous SQL command, the result should be as shown on the following screen.
If you need to know more details about the other options, you have to navigate to this link.
Let’s move into the following example to see actual data insertion using the bulk data command.
SQL Bulk Insert Example
We have a CSV file containing big data from the Annual Enterprise Survey, generated in the 2020 financial year, and we need to insert it into our database table.
But before that, we first need to check what the data type is for each column for the file looks like the image below.
You can download it from here.

Firstly, we need to create a table with the same columns as in the survey file and use the same data types for these columns.
-- PRIMARY KEY
CREATE TABLE Financial_Survey (
year INT NULL,
account_name VARCHAR(50) NULL,
units VARCHAR(50) NULL,
amounts VARCHAR(50) NULL
);Then, we have to place the financial survey file on the local disk D:, then open ‘New Query’ in SQL Server Management Studio and write the following SQL command.
We will only specify the error file path in the command to check for errors.
BULK INSERT Financial_Survey FROM 'D:\\Financial_Survey.csv' WITH (<br> FORMAT = 'CSV',<br> ERRORFILE = 'D:\\Database_Errors.txt'<br>);The following result shows an initialized file of errors.


You will see this file in the same directory as the Financial_Survey.csv file path, and these errors occurred because we inserted it into columns with the wrong data types.
Look at the “amounts” column; it already has an integer data type, but the file had numbers with separated commas and wrongly formatted data.
Fixing File Issues
Let’s correct the unformatted data and the wrong data types.
Delete the commas ‘,’ from the amounts column values in the CSV file by selecting the full column, right-clicking, then choosing ‘Numbers’ from ‘Cell Formatting’. Delete the comma by unchecking the ‘Use comma’ option; otherwise, you have to select ‘(1234)’ as an integer data type.
In the next step, you have to change varchar(50) to varchar(max) as shown in the code below to avoid any errors.
Also, make sure that the columns in the CSV file are in the same order as in the database table columns.
Anyway, the updated CSV file should be here; you can re-download it again.
-- PRIMARY KEY
CREATE TABLE Financial_Survey (
year INT NULL,
account_name VARCHAR(max) NULL,
units VARCHAR(max) NULL,
amounts INT NULL
);Then, try to execute the same command for SQL bulk data insertion.

The result should appear like the image below when you use the select query.

Anyway, in the following section, you will learn how to store the CSV file in a database using the C# programming language.
Storing and Importing a CSV File Using C# into a Database Table
It is easy to import CSV files or create a bulk insert using stored procedures and C#. With the SQL bulk insert command, you have to create a procedure in the SQL server with a required parameter containing the path of the CSV file. That’s all.
Note: you won’t be able to use the same previous query in the procedure; we have to make some changes.
CREATE PROC Financial_Year_Proc
@fpath nvarchar(500)
AS
DECLARE @bulk_query NVARCHAR(2000)
SET @bulk_query = N'BULK INSERT Financial_Survey FROM ''' +
@fpath +
N''' WITH (FORMAT= ''CSV'')';
EXEC sp_executesql @bulk_query;In the next step, we have to create a database connection with C# and then develop a file explorer for CSV files only. The code below is just some snippets from our real project to focus on the idea.
Open Visual Studio Code and create a new C# desktop project.
The form should look like the image below.

Let’s create the database connection.
using System;
using System.Collections.Generic;
using System.ComponentModel;
using System.Data;
using System.Drawing;
using System.Linq;
using System.Text;
using System.Threading.Tasks;
using System.Windows.Forms;
using System.Data.SqlClient;
namespace WindowsFormsApp1
{
public partial class Form1 : Form
{
string con_string;
SqlConnection cnn;
public Form1()
{
this.con_string = @"Data Source=.\SQLEXPRESS;Initial Catalog=dbtest; Integrated Security =true";
this.cnn = new SqlConnection(this.con_string);
InitializeComponent();
}
// Button of file explorer should be here.
}
}
Then, we have to create an event for the ‘Choose the Path’ button, and inside it, we should invoke the ‘OpenFileDialog’ that enables file exploration. Additionally, we need to set the filter to show only CSV file types in the explorer.
private void button1_Click(object sender, EventArgs e)
{
OpenFileDialog opnfd = new OpenFileDialog();
opnfd.Filter = "Excel Files (*.csv;)|*.csv;";
if (opnfd.ShowDialog() == DialogResult.OK)
{
// Here we need to build
string file_path = opnfd.FileName;
this.execute_proc(file_path);
}
}After that, let’s create the “execute_proc” function that will be responsible for sending the file path to the stored procedure.
public void execute_proc(string file_path ) {
this.cnn.Open();
SqlCommand sqlcmd = new SqlCommand();
sqlcmd.CommandType = CommandType.StoredProcedure;
//Path The name of Procedure
sqlcmd.CommandText = "Financial_Year_Proc";
sqlcmd.Connection = cnn;
// Procedure Parameters
SqlParameter[] param = new SqlParameter[1];
param[0] = new SqlParameter("@fpath", SqlDbType.VarChar);
param[0].Value = file_path;
sqlcmd.Parameters.AddRange(param);
sqlcmd.ExecuteNonQuery();
this.cnn.Close();
}Anyway, let’s summarize it in a few points.
Conclusion
In this tutorial, you understood how to insert bulk data into database using the SQL command. You also learned how to bring these data using the SQL query and C# programming language.
Let’s explain that in a few paragraphs.
SQL Server bulk insert is a command used in a procedure or SQL Server query to store big file data. The order of columns, column counts, and data types in the CSV file should be the same in the database table to avoid any errors.
The SQL Server bulk insert undergoes some changes when used within a procedure.
Additionally, there are numerous options available to assist us, including error collection from table rows, file formatting, and various other settings. You can find more details at this link.
Thank you for reading. Happy Coding!